The “no-makeup makeup” trend isn’t going anywhere. It’s the ultimate beauty hack: looking polished and awake without looking like you tried too hard. But irony often strikes when we realize that looking “natural” can sometimes take just as much time and effort as a full glam session.
Many of us get stuck in a loop of blending, correcting, and re-blending until we’ve lost precious time in our morning routine. The good news is that perfecting a subtle, everyday eye look doesn’t require a degree in cosmetology or an hour in front of the mirror. With the right technique and a streamlined kit, you can define your eyes, brighten your face, and be out the door in minutes.
This guide breaks down a foolproof process to master that effortless, fresh-faced aesthetic. Whether you are running late for work or heading to a casual brunch, these steps will help you enhance your natural features quickly and effectively.
Gather Your Tools
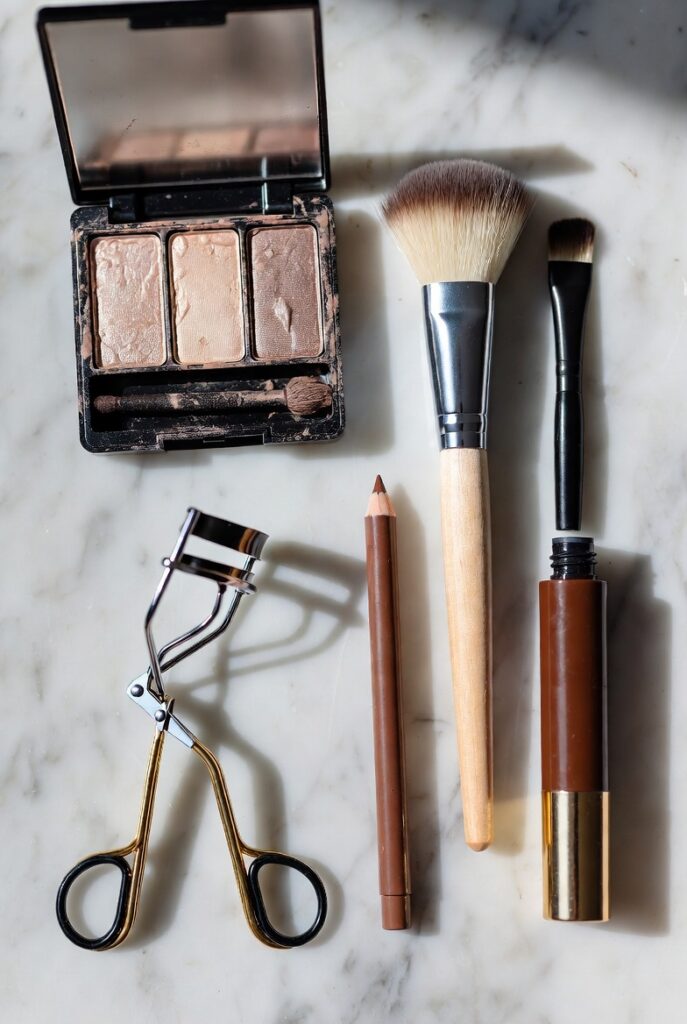
Before you start, make sure you have the essentials on hand. The secret to speed is organization; you don’t want to be digging through a messy makeup bag while the clock is ticking. For a natural look, you don’t need a massive palette or twenty different brushes. Here is what you should grab:
- Neutral Eyeshadow Palette: Look for a small palette or a few single shadows in earthy tones. You need a base shade that matches your skin tone, a slightly lighter shade for highlighting, and a medium brown or taupe for definition. Matte finishes generally look more natural than shimmers, though a satin finish can add a nice glow.
- Eyeliner: A soft pencil liner in brown or charcoal gray is less harsh than black liquid liner.
- Mascara: Choose a formula that separates and lengthens rather than one that clumps for volume. Brown mascara is an excellent choice for fair skin tones or for a softer daytime vibe.
- Brow Product: A tinted brow gel or a fine-tip pencil works best for speed and subtlety.
- Brushes: You really only need two: a fluffy blending brush and a smaller, denser brush for detail work.
- Eyelid Primer (Optional but Recommended): This keeps your hard work in place all day.
Step 1: Prep the Canvas
Great makeup starts with skin prep. Even the most expensive eyeshadows will crease or fade if the eyelid is oily or dry. Start with a clean, dry eyelid. If you have just applied moisturizer or eye cream, give it a moment to sink in completely.
Next, apply a tiny amount of eyelid primer. If you don’t own a specific eye primer, a dab of your regular face concealer works well too. This step neutralizes any veins or redness on the lid, creating a blank canvas that makes your eyes look instantly more awake. Set this primer with a dusting of translucent powder or a skin-tone eyeshadow to ensure smooth blending later.
Step 2: Apply the Base Shadow

The goal of a natural look is enhancement, not drama. Start by sweeping a light, neutral eyeshadow across your entire eyelid, from the lash line up to the brow bone. This shade should be close to your skin tone or just one shade lighter.
Using a fluffy blending brush, use windshield-wiper motions to ensure the color is evenly distributed. This base layer helps to brighten the eye area and makes the subsequent colors easier to blend. If you want a little extra “pop,” you can use a shade with a slight satin sheen on the center of the lid, but keep the brow bone matte to avoid looking shiny.
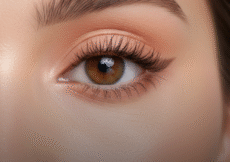
Step 3: Add Subtle Definition
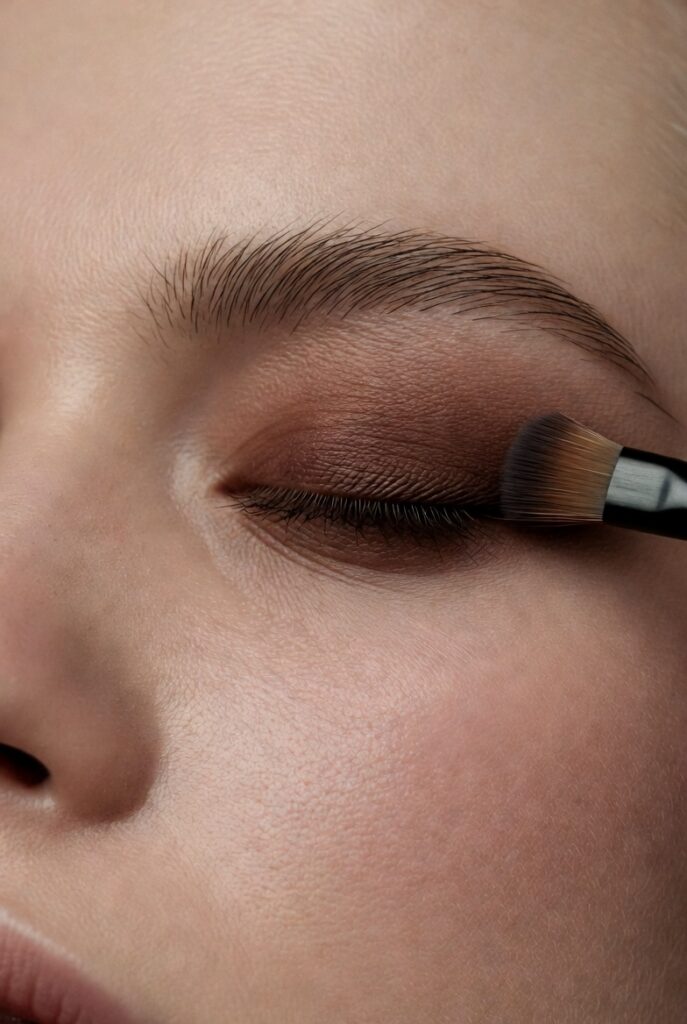
This step adds dimension without the heaviness of a smokey eye. Take a medium shade—think soft brown, taupe, or a cool beige—that is slightly darker than your skin tone. Using your fluffy brush, concentrate this color into the crease of your eye (the fold where your eyelid meets your brow bone).
Keep your eyes open and look straight into the mirror while doing this. This helps you see exactly where the shadow will be visible. Blend thoroughly so there are no harsh lines. The transition from your lid color to your crease color should be seamless. This simple shadow trick mimics natural shadows, making your eyes appear larger and deeper.
Step 4: Define the Lash Line
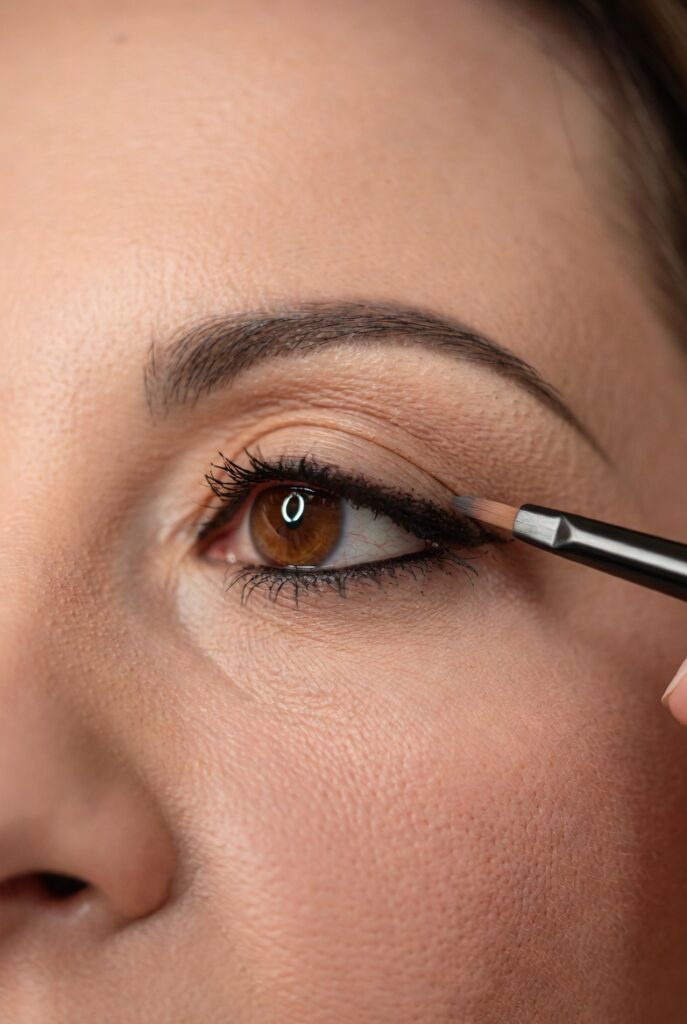
Eyeliner can be tricky when you are aiming for “natural.” A thick, black winged liner is a classic, but it often reads as “makeup.” Instead, try the “tightlining” technique or a soft smudge.
Take your brown or charcoal pencil liner and gently dot it along your upper lash line, staying as close to the roots of your lashes as possible. You aren’t trying to draw a perfect line; you are just trying to make your lashes look thicker at the base.
Once applied, use a small, dense brush or even your ring finger to smudge the liner slightly. This softens the edge and creates a hazy, lived-in definition that looks effortless. Avoid lining the bottom waterline, as this can close off the eye and make it look smaller. If you want definition on the lower lashes, use whatever leftover shadow is on your brush and lightly sweep it under the lower lash line.
Step 5: Mascara and Brows
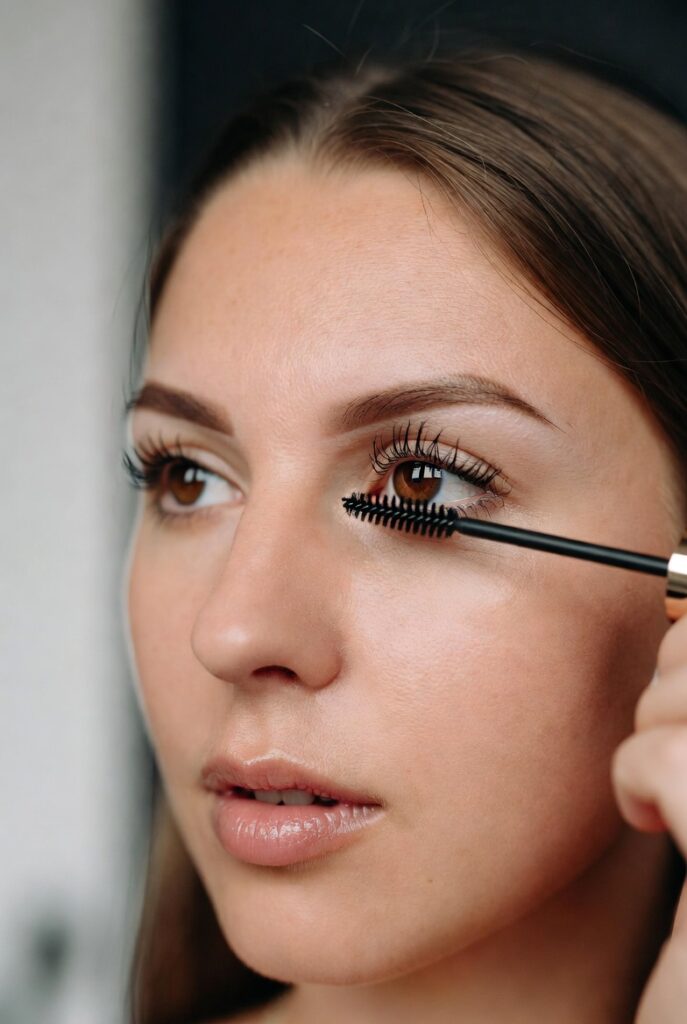
Nothing opens up the eyes quite like curled lashes. Use an eyelash curler before applying mascara. Start at the base of your lashes and gently squeeze, walking the curler out toward the tips for a natural curve.
Apply one or two coats of mascara. Wiggle the wand at the roots and pull through to the tips to separate and define. If you make a mess and get mascara on your eyelid, wait for it to dry completely before flicking it off with a clean spoolie or Q-tip—trying to wipe it while wet will only smear it.
Finally, frame your eyes with your brows. Unruly or overly drawn brows can distract from a natural look. Brush your brow hairs up with a spoolie. If you have sparse areas, fill them in lightly with a pencil using short, hair-like strokes. Finish with a clear or tinted brow gel to keep them in place. The aim is fluffy and groomed, not blocky.
Step 6: The Finishing Touches
Take a step back from the mirror. Check for any harsh lines or unblended patches. Use your clean blending brush to go over the edges of your eyeshadow one last time.
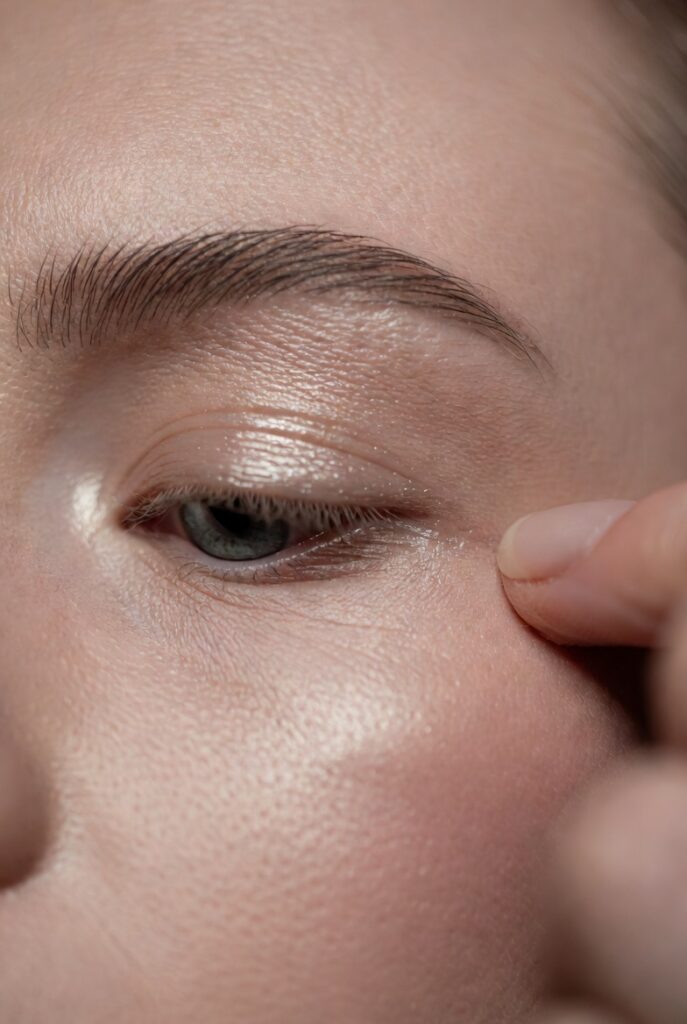
If you want to look extra awake, dab a tiny bit of a shimmer champagne or pearl eyeshadow on the inner corner of your eyes (near the tear duct). This reflects light and counteracts dark shadows that tend to gather there.
Lastly, a quick spritz of setting spray can help melt the powders into your skin, removing any “dusty” texture and ensuring your natural look survives the day.
Customizing Your Routine
Creating a signature natural eye look is all about adapting these steps to your unique features. The beauty of this routine is its flexibility.
- For Hooded Eyes: Bring your crease shade slightly higher up onto the brow bone so the color is visible when your eyes are open. Focus on keeping the lid space bright.
- For Deep-Set Eyes: Go lighter on the crease color to avoid pushing the eyes further back. Focus on bright, light shades on the lid.
- Common Mistakes to Avoid:
-
- Over-blending: While blending is key, over-doing it can muddy the colors into one gray mess. Use a light hand.
- Using shades that are too dark: Stick to colors that are only a few shades deeper than your skin tone. High contrast creates drama, low contrast creates a natural effect.
- Heavy liner: Keep the liner thin and focused on the outer corners to lift the eye.
Final Words
Once you have practiced this routine a few times, muscle memory takes over. You will find that you can achieve polished, defined, and bright eyes in five minutes or less. It’s the perfect way to feel put-together without letting your makeup routine dominate your morning.

