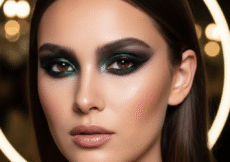
Have you ever followed an eye makeup tutorial step-by-step, only to find the beautiful design disappears the moment you open your eyes? If so, you might have hooded eyes. This common and beautiful eye shape just requires a few different techniques to make your makeup pop.
Many standard makeup tutorials are designed for eyes with a prominent, visible eyelid. When you have hooded eyes, a layer of skin droops over the crease, making your mobile lid less visible. This can lead to smudged eyeliner, hidden eyeshadow, and general frustration. But don’t worry—you don’t have to give up on creating stunning eye looks.
This guide is specifically for you. We’ll walk you through everything from prepping your eyes to mastering eyeliner techniques that stay visible. You’ll learn how to work with your eye shape to create looks that enhance your natural beauty and make your eyes stand out.
Understanding Hooded Eyes

Before diving into the techniques, let’s clarify what hooded eyes are. Hooded eyes feature an excess layer of skin that folds down from the brow bone to the lash line, partially or fully obscuring the eyelid. When your eyes are open, this “hood” covers your mobile lid, which is the part that moves when you blink.
This unique shape presents a few common challenges:
- Hidden Lid Space: Eyeshadow and eyeliner applied to the mobile lid can disappear under the fold.
- Smudging and Transfer: Makeup on your lash line or lid can easily transfer onto the brow bone because of the skin contact.
- Standard Tutorials Fail: Following a typical “apply shadow in the crease” tutorial often results in the color being completely hidden.
Recognizing these challenges is the first step. The key isn’t to fight your eye shape but to adapt your application method.
Prepping the Eye Area
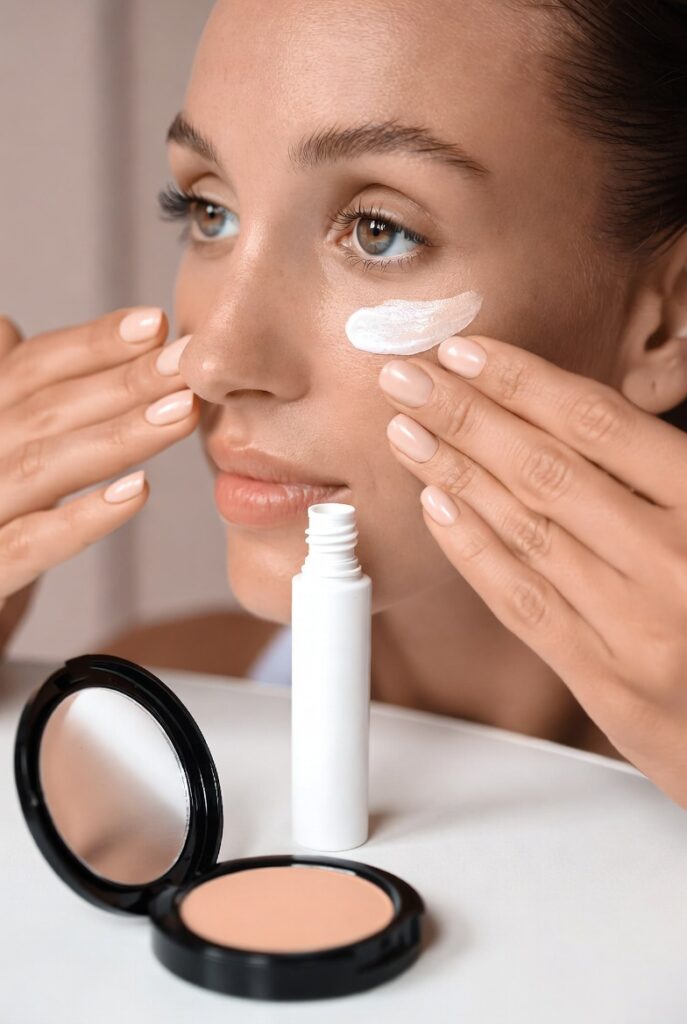
A great makeup look starts with a solid foundation. For hooded eyes, proper prep is non-negotiable to prevent smudging and ensure your look lasts all day.
Hydration and Primer
Start with a lightweight, non-greasy eye cream to hydrate the delicate skin. After it has fully absorbed, apply a long-lasting, matte eye primer. A quality primer creates a smooth canvas and gives your eyeshadow something to grip onto, preventing it from creasing or transferring. Apply it from your lash line all the way up to your brow bone.
Set the Base
To lock in the primer and create an even-toned base, lightly dust a neutral-colored setting powder or a nude eyeshadow over the entire primed area. This step helps eyeshadows blend more seamlessly and further prevents creasing.
The Right Tools for the Job
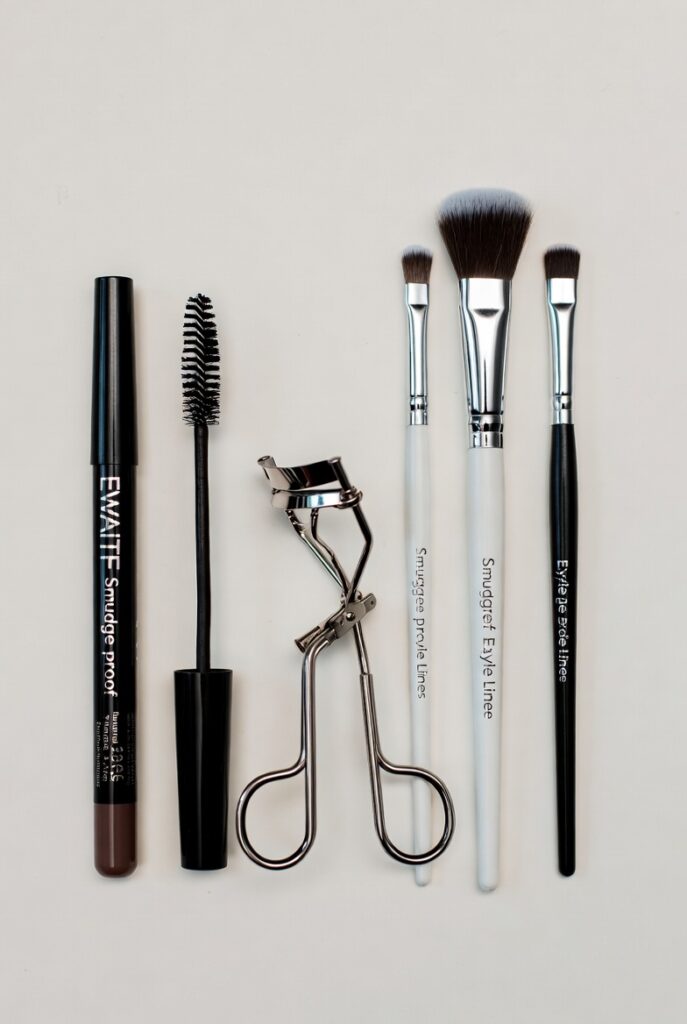
Using the right brushes can make a huge difference. For hooded eyes, smaller brushes offer more precision and control, which is essential when working with limited visible space.
- Small, Tapered Blending Brushes: These are perfect for applying and blending color in a controlled manner, especially when creating a new crease.
- Precise Pencil Brushes: Use these for detailed work, like smudging liner or adding depth to the outer corner.
- Long-Wear Products: Opt for smudge-proof eyeliners and tubing mascaras. These formulas are designed to resist transfer, which is a common issue for hooded eyes.
Creating a Visible Crease
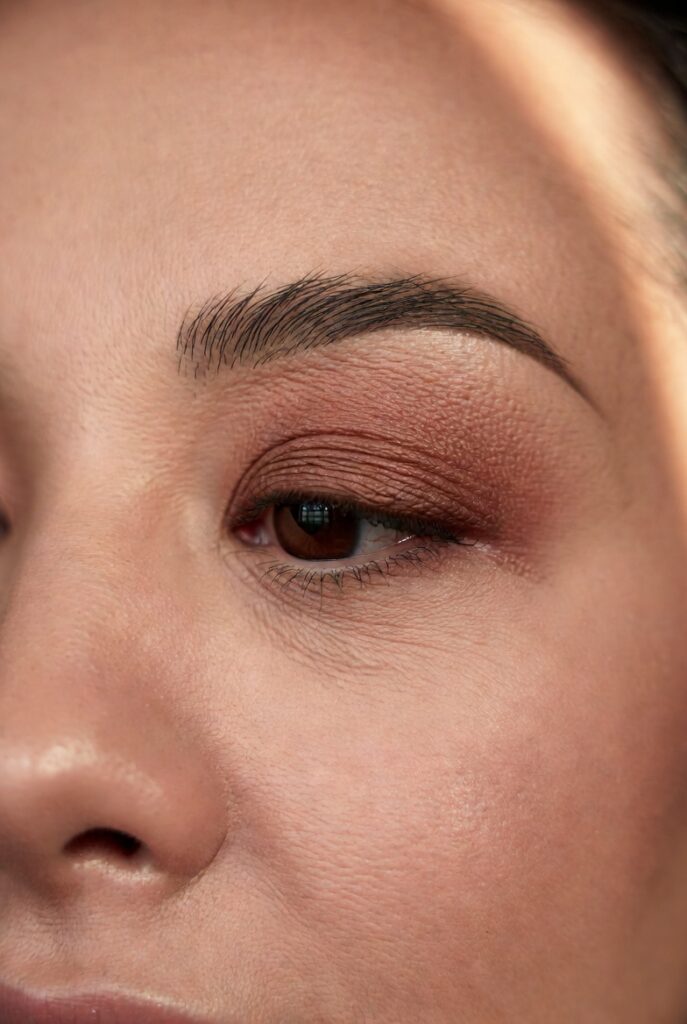
This is the most important trick for hooded eye makeup. Since your natural crease is hidden, you need to create a new, higher one that is visible when your eyes are open.
Look straight into a mirror with your eyes relaxed and open. Identify your orbital bone—the bone structure right below your eyebrow. Your “new” crease should be placed slightly above your natural fold, right on or just above this bone.
Use a small blending brush and 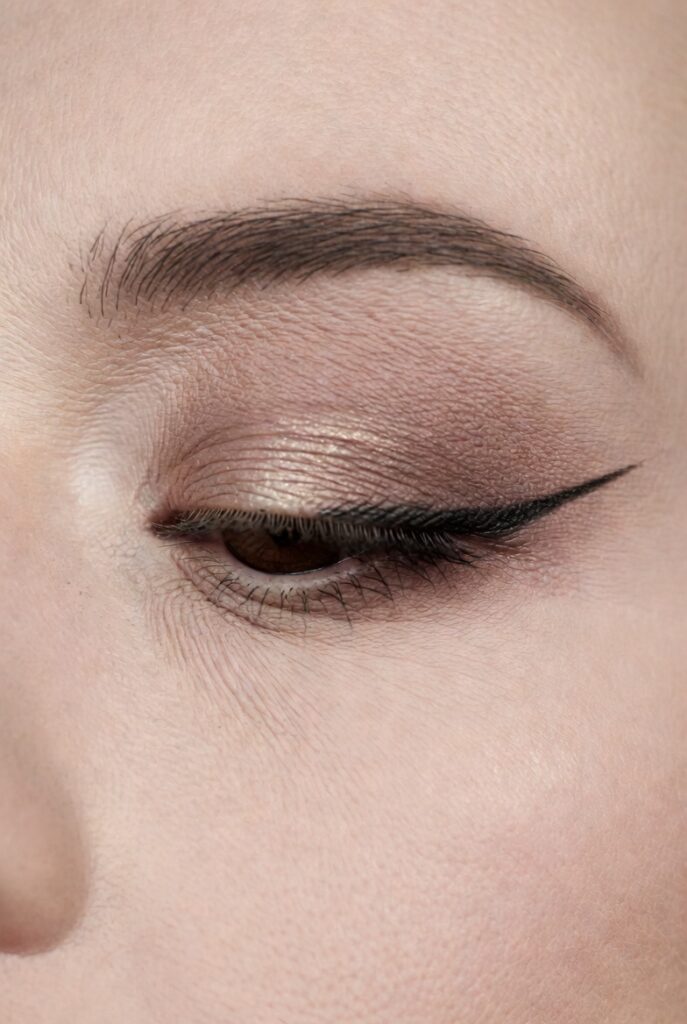 a n
a n
tral matte eyeshadow to lightly sketch a line following this higher placement. Then, blend the color upward and outward toward the tail of your brow. This technique creates the illusion of depth and lifts the eye.
Eyeshadow Application Tips
With your new crease established, you can start building your eyeshadow look. The key is strategic placement.
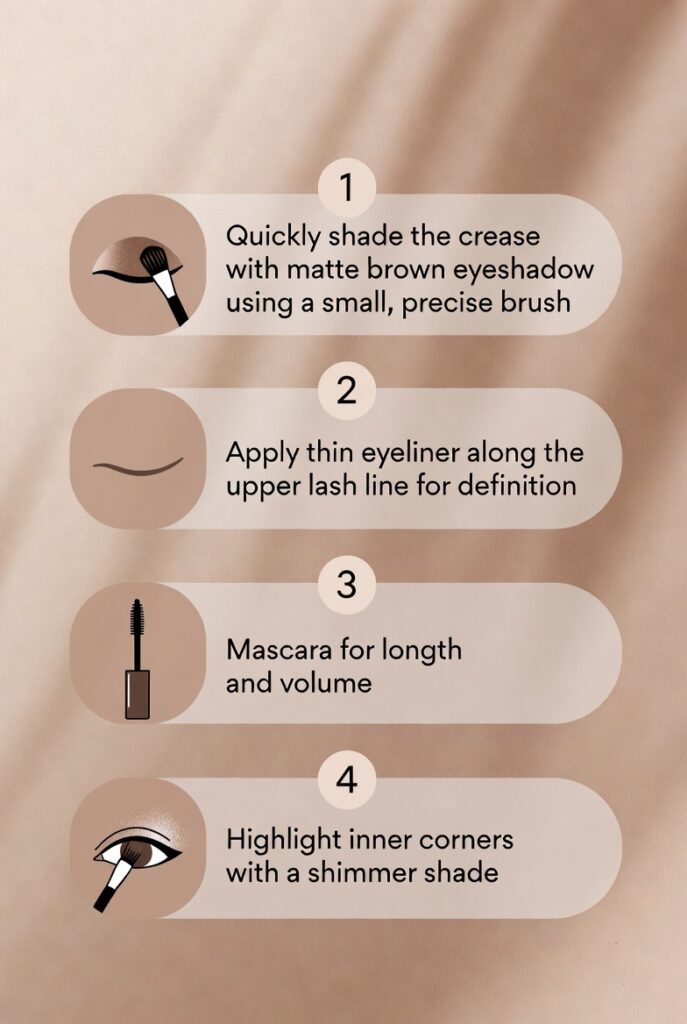
Base Shade
Apply a light matte eyeshadow across your entire visible lid and inner corner. This brightens the area and makes your eyes appear larger. Avoid using shimmer on the mobile lid if you want to create the illusion of more space, as shimmer can emphasize the hood.
Transition and Definition
Apply your transition shade (a color a few shades deeper than your skin tone) into the “fake crease” you created, blending upward. For the outer corner, create a “V” or a soft wing shape with a darker shadow. Always blend upward and outward—never downward, as this can make the eyes look droopy.
Shimmer Placement
If you love shimmer, you can still use it! Just be strategic. Dab a pop of light-reflecting shimmer onto the very center of your mobile lid (the part most visible when you blink) or on the inner corner. Avoid placing shimmer on the hooded part of your eye or too close to the brow bone, as it can highlight the fold.
Eyeliner Techniques for Hooded Eyes
Eyeliner can be tricky, but these techniques will help you achieve clean, visible lines.
- Tightline: The most effective technique is tightlining. Use a waterproof pencil or gel liner to fill in your upper waterline (the area under your upper lashes). This defines the eyes and makes your lash base look fuller without taking up any precious lid space.
- Keep it Thin: If you apply liner on your lash line, keep the line as thin as possible. A thick band of eyeliner will completely cover what little lid space is visible.
- The Straight Wing Trick: To create a winged liner that doesn’t get distorted by your hood, look straight ahead. Draw the wing’s tail first, extending it from your lower lash line’s angle. Then, connect it to your lash line with a straight line, leaving a small gap over the fold. Fill it in to complete the wing.
Mascara and Lashes
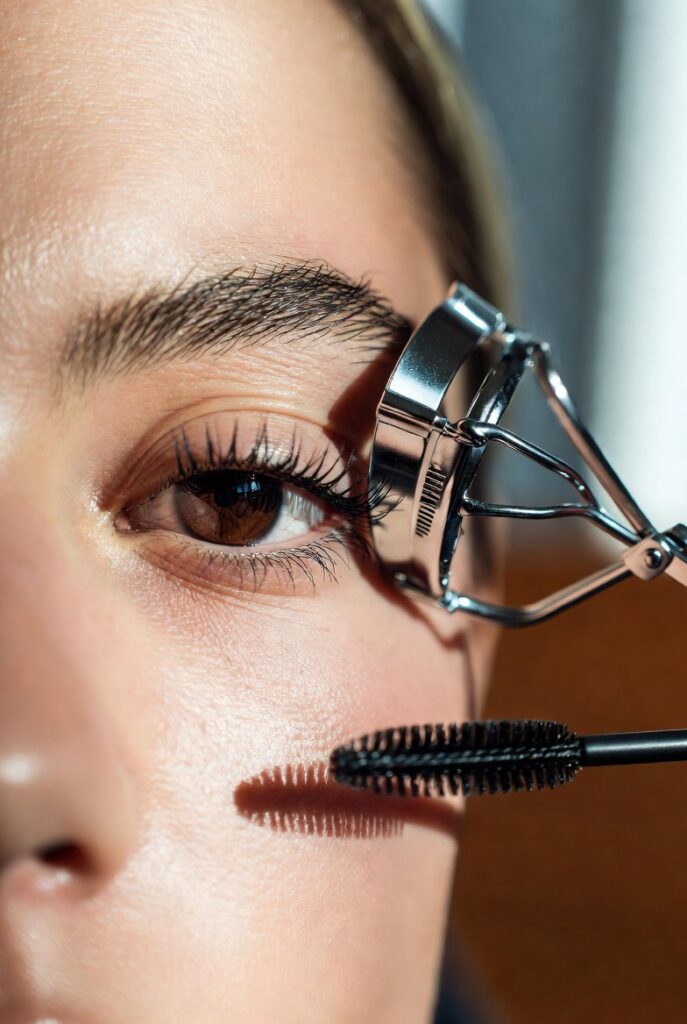
Finishing your look with the right mascara and lashes can open up your eyes dramatically.
First, always curl your eyelashes. This simple step provides an instant lift. Next, apply a tubing or waterproof mascara. Tubing formulas wrap around each lash, making them smudge-proof and transfer-resistant—a lifesaver for hooded eyes.
When choosing false lashes, opt for styles that are shorter on the inner corner and flare out with a lift at the outer corner. Wispy, separated lash styles also work well because they add length and volume without weighing the eye down.
Quick Everyday Routine for Beginners
Feeling overwhelmed? Here’s a simple routine to get you started:
- Prime and Set: Apply primer and a neutral powder.
- Create a Crease: Use a neutral brown shadow to create a new crease above your natural one, blending upward.
- Tightline: Define your eyes by tightlining the upper waterline.
- Curl and Coat: Curl your lashes and apply two coats of tubing mascara.
This minimal routine takes less than five minutes and will make a noticeable difference.
Common Mistakes to Avoid
- Thick Eyeliner: A thick line on the lid will make it disappear. Stick to thin lines or tightlining.
- Dark Shades in the Crease: Applying dark shadow in your natural (hidden) crease will make your eyes look smaller. Always go higher.
- Shimmer on the Brow Bone: Heavy shimmer here can emphasize the hood. Stick to a light matte or satin shade for highlighting.
- Blending Downward: Always blend eyeshadow up and out to create a lifted effect.
Frequently Asked Questions
Q: Can you wear a smokey eye with hooded eyes?
A: Absolutely! The key is to bring the “smokey” effect higher up, onto the visible part of your eyelid when your eye is open. Focus on blending the darker shades above your natural crease and outward.
Q: What’s the best eyeliner type for hooded eyes?
A: Waterproof gel or pencil liners are great for tightlining because they are creamy and don’t smudge easily. For a wing, a liquid liner pen can offer precision, but practice is key to getting the angle right.
Q: Should I apply makeup with my eyes open or closed?
A: A mix of both! Map out your crease and wing placement with your eyes open, looking straight into the mirror. Then, close your eyes to fill in and blend the products smoothly.
Your Best Eyes Yet
Learning to apply eye makeup for hooded eyes is all about adapting techniques to your unique and beautiful shape. It may take some practice to find the exact placement that works for you, but don’t be discouraged. Take photos with your eyes open as you experiment to see what creates the most flattering, lifted effect.
With these tips and a little patience, you can master any eye look you desire. Embrace your hooded eyes and get ready to create makeup looks that are perfectly tailored to you.
)